 how-to
Outdoor Water Feature Pump Maintenance: Complete Guide
Table of Contents
- Why Regular Water Feature Pump Maintenance Matters
- What You'll Need Before You Start
- How to Clean a Fountain Pump: Step-by-Step
- Best Tools for Cleaning Water Pumps
- Water Feature Pump Troubleshooting: Common Issues and Fixes
- Pond Pump Maintenance Schedule: Seasonal and Year-Round Care
- Common Mistakes to Avoid
- Keeping Your Water Feature Running Long-Term
- Frequently Asked Questions
Last Updated: October 3, 2026
Why Regular Water Feature Pump Maintenance Matters
A well-maintained water feature pump keeps your garden looking beautiful and running smoothly for years.
Think of your pump like a car engine. Skip oil changes and it seizes. Neglect your pump and the same thing happens.
Regular water feature pump maintenance prevents costly repairs. It extends the life of your equipment. Most importantly, it keeps your water clean and circulating properly.
Here's what happens when maintenance is ignored:
- Debris clogs the intake, leaves, dirt, and algae block water flow
- Mineral buildup forms, calcium deposits clog the impeller and housing
- Hoses crack and leak, dried-out tubing fails under pressure
- Pump stops working, complete failure leaves you with stagnant water
At Zenteak, we know that handcrafted water features deserve proper care. The right maintenance routine protects that investment.
What You'll Need Before You Start
Essential Tools and Materials
Gather these items before you begin any water feature pump maintenance work:
- Soft-bristled brush, for gentle cleaning without scratching
- Sponge or filter sponge, to clean intake screens
- White vinegar, natural descaling agent for mineral buildup
- Soft cloth, for drying components
- Bucket, to hold water and debris during cleaning
- Silicone sealant, for repairing small leaks
- Adjustable wrench, for hose connections
- Replacement hose clamps, if existing ones are corroded
- Small screwdriver set, for accessing pump housing
You don't need expensive specialty tools. Most of these items are already in your shed.
Safety Precautions
Always switch off power before starting any maintenance. This is non-negotiable.
Unplug the pump from the electrical outlet. Wait 10 minutes before touching any components.
If your pump uses a GFCI outlet, test it monthly to ensure it's working properly.
Never work on a wet pump with wet hands. Dry everything thoroughly first.
Keep children and pets away from the work area while you're servicing the pump.
How to Clean a Fountain Pump: Step-by-Step
Step 1: Switch Off and Drain
Turn off the pump at the electrical outlet. Do not skip this step.
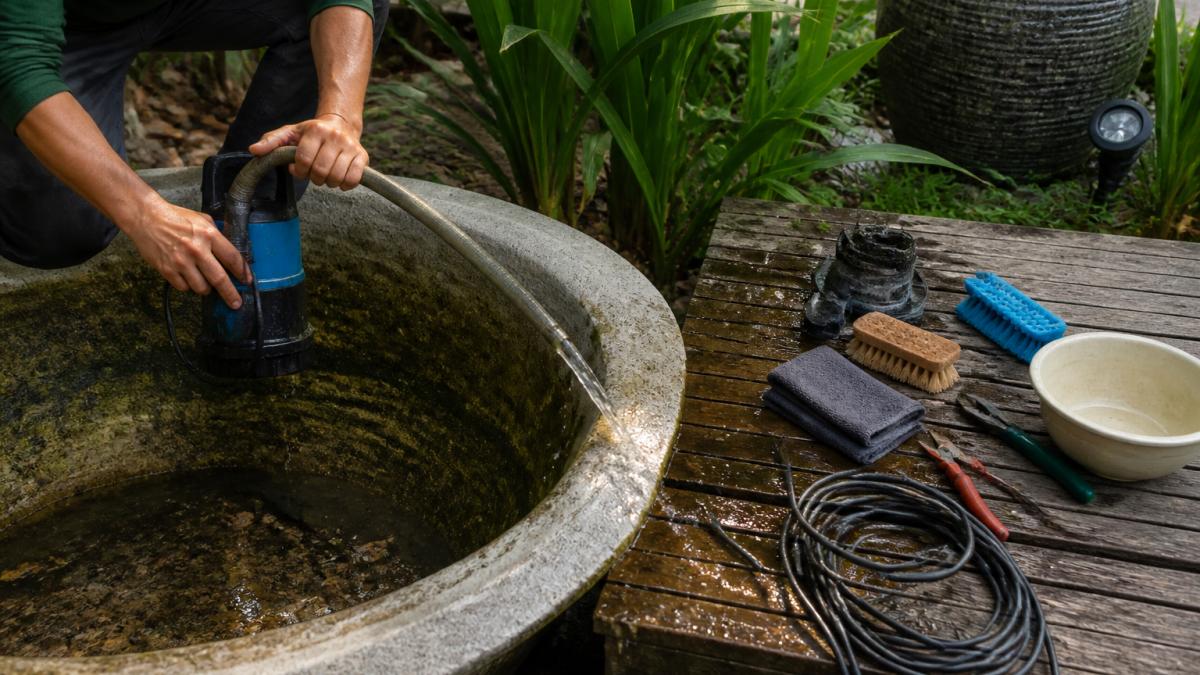
Let the system sit for 10 minutes. This allows any residual charge to dissipate safely.
Drain the water feature completely. You can use a submersible pump to empty the basin, or simply turn off the pump and let water evaporate over a few days if you're in no rush.
Once empty, inspect the basin. Remove any visible debris, leaves, or algae buildup.
Step 2: Remove and Inspect the Intake
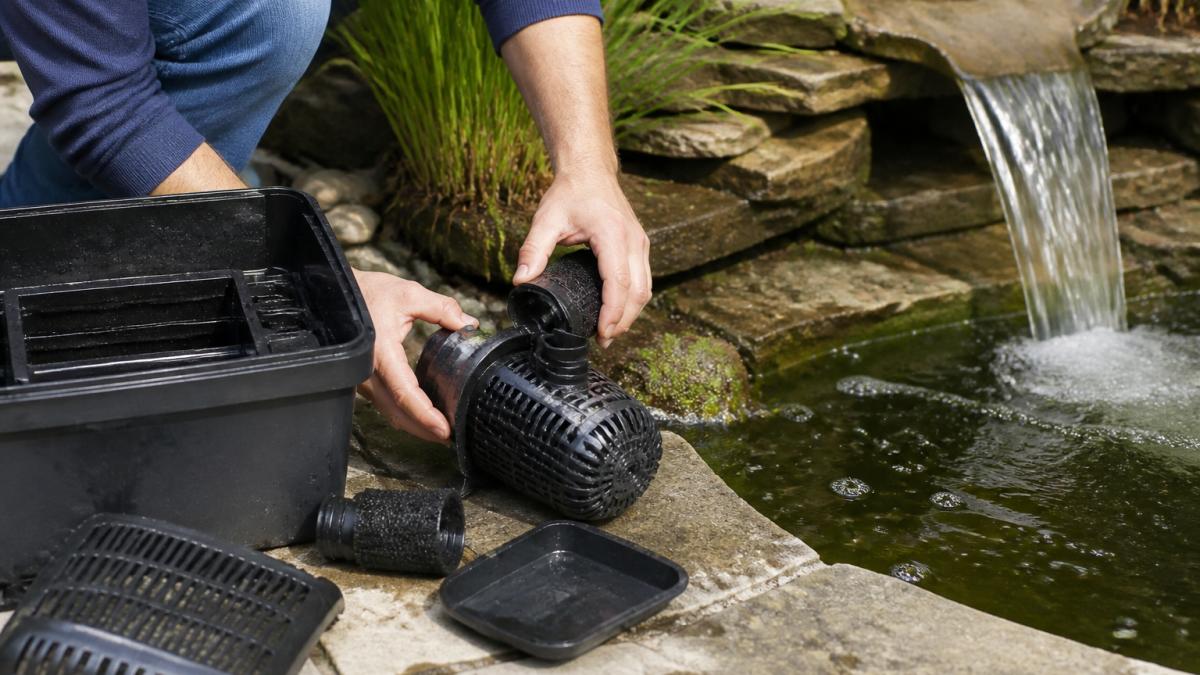
Locate the intake valve at the base of your pump. This is where water enters the pump housing.
Most intakes have a simple clip or screw fastening. Remove it carefully.
Pull the intake screen straight out. You'll likely see debris accumulated here.
Inspect the intake opening. Look for:
- Leaves and twigs
- Algae buildup
- Sand or silt
- Cracks in the plastic housing
If the intake screen is cracked, replace it now. A damaged screen allows debris into the pump impeller, causing blockages.
Step 3: Clean the Filter Screen and Sponge
The filter screen stops large debris from entering the pump.
Rinse the screen under running water. Use your soft-bristled brush to remove stuck debris gently.
If your pump has a foam sponge filter, squeeze it under warm water.
For stubborn algae or mineral deposits, soak the screen in white vinegar for 30 minutes.
Replace the filter screen if it's torn or permanently discoloured.
Step 4: Access and Clean the Impeller
The impeller is the spinning rotor inside the pump that moves water.
Locating the impeller housing: Most submersible pumps have a removable cover or housing cap.
Inspecting the impeller: Once exposed, you will see a small fan-like rotor (usually 2-4 cm in diameter) attached to a central shaft. Look for:
- White or grey mineral crusting on the blades
- Debris wrapped around the shaft
- Discoloration or algae film
- Cracks or chips in the rotor blades
If the impeller is severely cracked or a blade is missing, the pump must be replaced.
After cleaning, rotate the impeller shaft by hand (if accessible) to ensure it spins freely.
Step 5: Descale the Pump Housing
Mineral buildup reduces flow rate and damages the pump impeller over time.
Mix equal parts white vinegar and water.
Let it soak for 2 hours. The vinegar dissolves calcium deposits naturally.
After soaking, flush the housing with fresh water.
If deposits are stubborn, repeat the process. Never use harsh chemical descalers, they damage seals and gaskets.
Step 6: Check and Reconnect Hoses
Inspect all hoses and tubing for cracks, splits, or dry rot. Hoses degrade faster in direct sunlight.
Squeeze each hose gently. If it cracks or feels brittle, replace it. A failing hose will leak within days.
Check all hose connections. Look for water stains or drips around the fittings.
Tighten hose clamps if they're loose. Use your adjustable wrench to turn the clamp screw clockwise.
Best Tools for Cleaning Water Pumps
The right tools make maintenance faster and safer.
Soft-bristled brushes work best for cleaning without scratching pump housings.
Sponge filters trap debris effectively. They're inexpensive and easy to replace when worn.
White vinegar is your best friend for descaling.
Silicone sealant repairs small leaks around connections.
GFCI outlet testers are essential safety tools.
Many homeowners overlook the importance of proper tools.
Water Feature Pump Troubleshooting: Common Issues and Fixes
Low Water Flow or No Flow
Reduced flow usually means something is blocking the intake or filter.
Check the intake screen first. Remove it and inspect for debris. Rinse thoroughly and reinstall.
If flow is still low, the impeller may be clogged.
Run the descaling process described above. Vinegar dissolves deposits that block the impeller.
If the pump makes noise but no water flows, the impeller may be jammed.
Leaks Around Connections
Water leaking from hose fittings is the most common issue.
First, tighten the hose clamp. Sometimes a quarter-turn stops the leak completely.
If tightening doesn't work, disconnect the hose and inspect the fitting. Look for cracks or damage.
Apply silicone sealant around the connection. Let it cure fully before reconnecting water.
If the leak continues, the hose itself may be cracked.
Unusual Noise or Vibration
Grinding or squealing sounds mean something is wrong inside the pump.
Debris caught in the impeller causes grinding noises. Drain the system and remove the intake screen.
Squealing usually indicates the pump bearing is dry. Some pumps need occasional lubrication. Check your pump manual for specific guidance.
Vibration often means the pump isn't secured properly. Check that all mounting brackets are tight.
Pond Pump Maintenance Schedule: Seasonal and Year-Round Care
Weekly Tasks
Check water level. Top up if needed to keep the intake submerged.
Listen for unusual sounds. Grinding or squealing means something needs attention.
Inspect for visible debris floating in the water. Remove leaves and twigs before they clog the intake.
These quick checks take 5 minutes but catch problems early.
Monthly Tasks
Clean the intake screen. Remove accumulated debris and rinse thoroughly.
Check hose connections for leaks. Tighten clamps if needed.
Test the GFCI outlet. Press the test button, power should cut off instantly.
Inspect the filter sponge. Squeeze it clean under running water.
These monthly tasks take 20 minutes and prevent major failures.
Seasonal Maintenance and Winterization
Spring: After winter, inspect the entire system. Check for damage from freezing temperatures.
Summer: Monitor water clarity. If water becomes stagnant or cloudy, increase circulation time.
Autumn: Remove fallen leaves before they clog the intake. This is your busiest maintenance season.
Winter: In cold climates, drain the system completely. Store the pump indoors.
In temperate climates, reduce circulation time but keep the pump running occasionally.
Common Mistakes to Avoid
Ignoring small leaks. A tiny drip becomes a major failure within weeks.
Neglecting the intake screen. This is where most blockages start.
Leaving the pump running 24/7. Your pump needs rest.
Skipping the GFCI test. This safety device protects you from electrical shock.
Storing the pump outdoors in winter. Freezing temperatures crack the housing.
Using chemical descalers. Harsh chemicals damage seals.
Keeping Your Water Feature Running Long-Term
Consistent maintenance is the secret to long-term reliability.
Create a maintenance calendar. Mark weekly, monthly, and seasonal tasks.
Keep a maintenance log.
Invest in quality replacement parts.
At Zenteak, we design water features built to last.
Water circulation keeps your garden ecosystem healthy. Moving water prevents mosquito breeding.
Start your maintenance routine this week.
A well-maintained water feature transforms your outdoor space into a peaceful retreat.
Frequently Asked Questions
How often should I clean my water feature pump?
Clean your pump intake and filter screen weekly during the active season to prevent debris buildup and maintain proper water circulation. Monthly deep cleaning of the pump housing and impeller is recommended to remove mineral deposits and calcium buildup. If your water feature is in a shaded area with leaves or pollen, increase cleaning frequency. Seasonal maintenance before and after winter is essential for long-term durability.
What's the best way to descale a water feature pump?
Drain the pump completely and soak removable parts in white vinegar for 2-4 hours to dissolve mineral buildup. Use a soft brush to gently scrub calcium deposits from the impeller and pump housing. For stubborn deposits, a 1:1 vinegar-and-water solution works well. Rinse thoroughly with clean water before reassembling. Avoid abrasive scrubbers that damage internal components.
Can I use vinegar to clean my pond pump?
Yes, white vinegar is effective for removing mineral deposits and calcium buildup from your pond pump without damaging components. Soak filter screens and housing parts in vinegar for 2-4 hours, then scrub gently with a soft brush. For the impeller, use a diluted vinegar solution to avoid corrosion. Always rinse thoroughly with clean water after vinegar cleaning to prevent residue affecting water quality or pump performance.
What should I do if my water feature pump stops flowing?
First, check for a clogged intake by removing and cleaning the filter screen and sponge of debris. Inspect hose connections for kinks or blockages and ensure they're properly seated. Look for leaks around the pump housing that might indicate a broken seal. If the pump makes noise but produces no flow, the impeller may be jammed, carefully inspect and remove any debris. If flow remains low after these checks, the pump may need professional servicing or replacement.